
CamMicGo Guides
Camera not working in Chrome, Edge, Brave or Safari? How to allow it and fix it
When a website says it cannot start your camera, the webcam itself is rarely broken. In most cases the browser blocked the site, the operating system blocked the browser, another app is holding the camera, or the browser picked the wrong device. Work through the checks below in order, then confirm with a live webcam test.
1. Allow the camera for the website
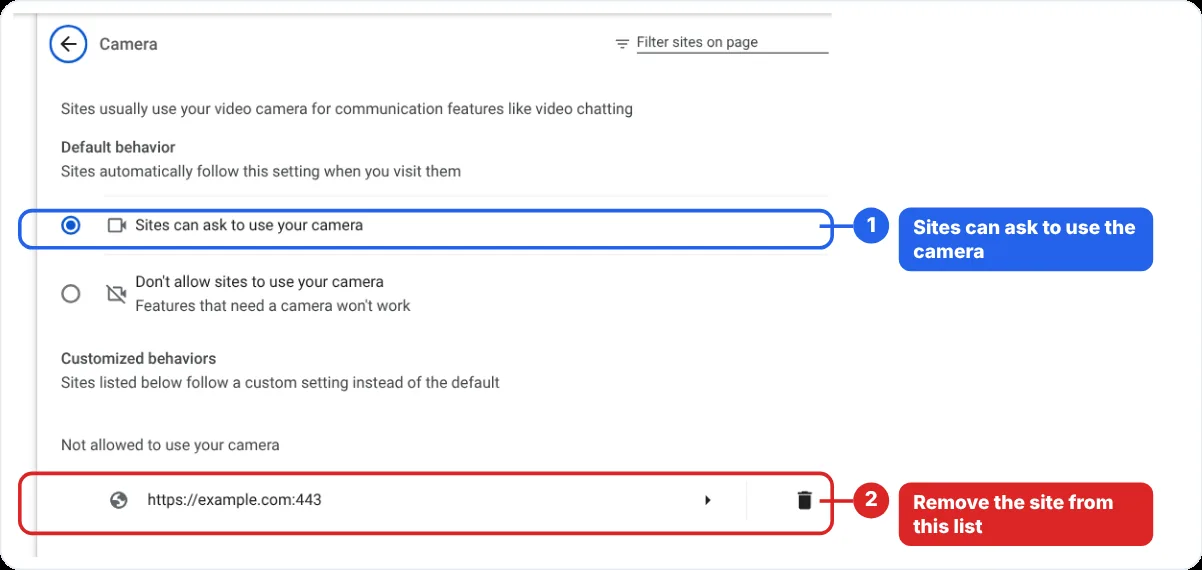
Browsers ask once per site. If you clicked “Block” or “Never allow” by mistake, the site keeps failing silently until you change it.
- Click the icon at the left of the address bar (a camera or settings icon) and set Camera to Allow, then reload the page.
- Chrome: Settings → Privacy and security → Site settings → Camera. Remove the site from “Not allowed to use your camera” and make sure the right camera is selected at the top.
- Edge: Settings → Privacy, search, and services → Site permissions → All permissions → Camera, and turn on “Ask before accessing”. When it is off, Edge blocks the camera for every site.
- Brave: open brave://settings/content/camera and check the allowed and blocked sites.
- Safari on Mac: Settings → Websites → Camera, then choose Ask or Allow for the site.
2. Let the browser use the camera in Windows or macOS
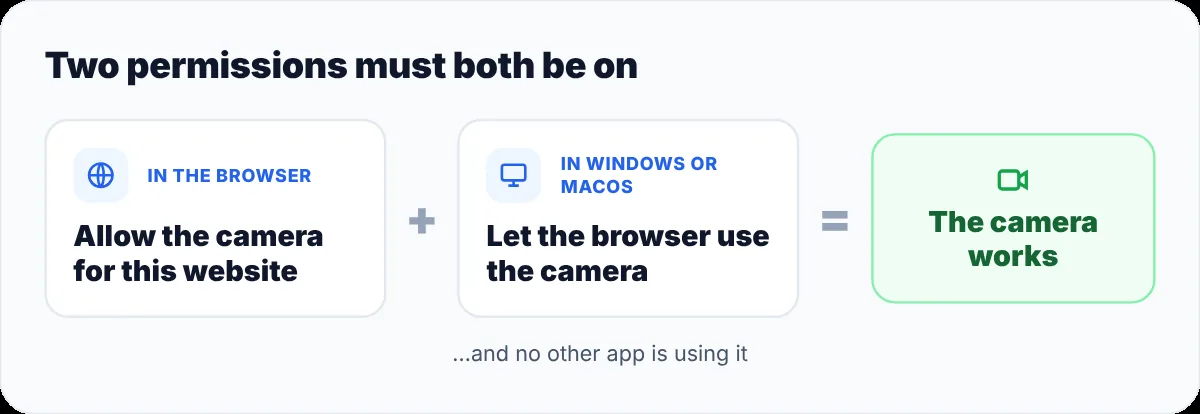
Even when the site is allowed, the system can still block the browser.
- Windows 10 and 11: Start → Settings → Privacy & security → Camera. Turn on camera access and “Let desktop apps access your camera”. Browsers count as desktop apps, so this switch covers Chrome, Edge, Brave and Firefox.
- macOS: System Settings → Privacy & Security → Camera, and turn on your browser. Quit and reopen the browser afterwards, otherwise the change is not applied.
- On a work or school computer, an administrator can lock these settings. If the switches are greyed out, ask your IT team.
3. Close apps that are already using the camera
A webcam is often available to one app at a time. If Teams, Zoom, Skype, OBS or another browser tab is using it, the website gets an error or a black image.
- Close video apps completely, including from the system tray on Windows.
- Close other tabs that had a video call or a webcam test open.
- Unplug and reconnect an external webcam, then reload the page.
4. Pick the right camera
If you see a black or frozen picture, the browser may be using another device: an IR face-recognition camera, a phone used as a webcam or a virtual camera added by OBS or another app.
- Choose the camera in the site’s own video settings when it has them.
- In Chrome, choose the default camera at the top of Settings → Privacy and security → Site settings → Camera.
- Disconnect virtual cameras you do not use.
5. Check the hardware switches
- Many laptops have a sliding privacy shutter above the screen, or a keyboard key that turns the camera off.
- Some security suites have a webcam protection feature that blocks browsers. Look for it in your antivirus settings if everything else looks correct.
- Restart the computer if the camera has disappeared from every app.
6. Confirm with a live test
Open the CamMicGo webcam test in the same browser. If the camera works there but not on another site, the problem is that site’s permission or settings. If it fails everywhere, check the system permission and drivers, or try another USB port.